Showing posts with label Birthday. Show all posts

10.11.2012

Remember to DANCE & a recipe!

The best message I got on my birthday was an e-mail from Mike with a link to a you tube video. He said "its your birthday babe, remember to dance..."

Couldn't have said it better myself. I love this song and adore this video. Perfect way to wake up on my first day of 25!


Here is the recipe for the peach and hazelnut cream tart! Enjoy!!


Pate Sucre

250g flour
100g butter (room temperature)
100g icing sugar
1 egg
20g water

sift the flour.
cream the butter and icing sugar together.
add the egg. mix until smooth and homogeneous.
add the sifted flour.
if using a mixer, beat until the dough comes together.
if using your hands, use your hands or a scrapper to "frasage" the dough. basically, take a handful of dough and press it into the table while sliding your hand or scrapper so the dough smears. once all the dough has been frasaged, gather it. wrap in plastic and refrigerate 30 minutes.

Creme noisette

250g butter (softened)
250g sugar
250g hazelnut powder
200g eggs
50g flour
5g vanilla extract
50g cooled pastry cream
cream the sugar and butter together.
add the hazelnut powder and cream together.
add the eggs, one by one.
beat the mixture to "blanch" it. (make it white/lighter in color)
add sifted flour, mix.
add rum and vanilla. mix to combine. 
fold in pastry cream.cover and fridge.

2 white peaches, sliced.


roll out your pate sucree, poke the dough to make holes for steam while it bakes. line your tart ring or pan with the dough (decorate the edges if you want!) and bake until lightly golden (you are baking it again so you want it to be under baked at this point so it doesn't burn later). 

Let the shell cool for a few minutes (use this time to cut your peaches?) and then pipe or spread a layer of cream in the bottom of the shell. The cream will puff/rise a little in the oven so leave space for that. Place your peaches on top and bake again for about 20 minutes or until you see the cream browning around the edges. Let cool and bon appetit!

10.10.2012

Quarter Century Club

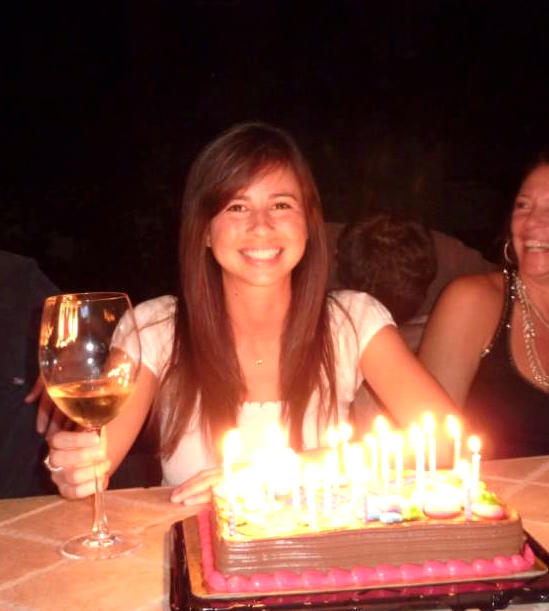
I am officially a member. Yesterday was my 25th birthday! Eek, seems like a big scary number. I remember when I was younger and I thought I was going to have all my shizz together by this age. Nobody tells you that those chances are slim. I thought I would be in a stable, steady job making enough money to pretend I am a real adult but lets be honest, that is not where I am right now.

Where I am is SO much better than that. Of course I still think about settling down and making a living but I could not be more happy about where my life has led me up to this point. I mean, how many people get to do what I am doing? Live abroad in a beautiful city to pursue their dreams? Have so many friends and family come and explore Paris with me? Have found the love of my life and irreplaceable friendships? My life is pretty dang good if you ask me. So, as scary as 25 might sound I think it will be another incredible year. I'm excited to see what comes my way and embracing all that life is!

The best part of my whole birthday was seeing one of my BEST friends! Erin and I have been PIC's since she rushed Gamma Phi in 2006 and the love/obsession was made public during big/little week and we've been having a blast ever since. She just recently moved to Madrid to teach English and lives with her little/my grandlittle and they are living the dream over there. I can't wait to (hopefully) go to see their home next month!

Erin stayed all weekend and her face definitely made me cry when I saw her. I am so lucky to have her in my life. Not only is she a great friend but she is an inspiration and has taught me a lot about life, happiness and friendship. Thank you for being so amazing little!


To celebrate we got all our Paris friends together for dinner at a local Argentinean restaurant for empanadas and ice cream. It was great to finally have everyone together again.

Thank you to everyone who helped me celebrate and wished me happy birthday! You are all amazing and I'm so glad to have you in my life!

Merci beaucoup! 

PS- Old age is taking its toll. I am now sick in bed with a fever and the works! Worth it though. But the recipe for this tart will be coming soon! xo


11.13.2011

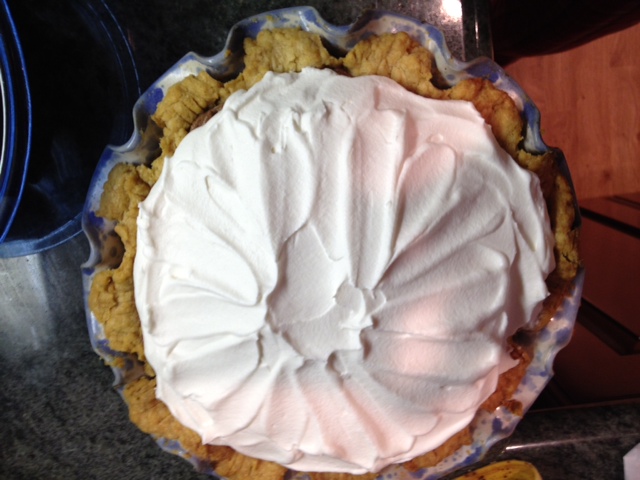
Chocolate Banana Cream Pie

MMM, is your mouth watering? It should be. I had to recover from a food coma from Mike's dad's birthday dinner the other night. I brought this incredibly delicious pie for dessert but first, we had Thanksgiving come early. Mike's mom made us an incredible feast for dinner! Everything from honey ham to stuffing and mashed potatoes. It was so good and I am already excited for more next week. (fat kid at heart).

The weekends always go by so quickly.  I savor the weekends with my family and friends. It is as carefree as it gets these days. Sunday, I spent most of my day constructing a chocolate banana cream pie. It takes more effort than I thought.

I started with making pie crust. Let it rest, then baked it.

Made the pastry cream. Let it cool.

Made the chocolate moose. Let it cool.

Made the whipped cream.

Made the chocolate curls. (they looked more like rough shavings oops).

Sliced the bananas and put it all together.  See, step by step.


Last but not least, we devoured it.

All of it.

yum.


RECIPE:


Crust. I used a different recipe but don't have it with me at the moment (sorry!) but dearest Martha has a great and similar recipe. Get it here


Cream.

  • 3 cups whole milk
  • 3/4 cup white sugar
  • 1/3 cup all-purpose flour
  • 1/4 teaspoon salt
  • egg yolks, slightly beaten
  • tablespoons unsalted butter
  • teaspoon vanilla

  • Scald (medium heat until it barely begins to bubble) the milk in a medium saucepan. 
  • In another saucepan, combine sugar, flour and salt. Slowly, add the scaled milk into the flour mixture. Turn the burner to medium heat and stir constantly until it gets thick (about 5 minutes). Once it is thickened, cover the mixture with a lid and cook for 2 more minutes, stirring occasionally. In a small bowl, have the 3 egg yolks, slightly beaten, ready; stir a small amount of the hot mixture into beaten yolks; when thoroughly combined, stir yolks into hot mixture. Take off the heat and mis in the butter and vanilla until smooth. Let cool completely.

  • Chocolate Moose.

  • 4 egg yolks
  • 1/4 cup sugar
  • cup heavy whipping cream
  • package (6 ounces) semisweet chocolate chips (1 cup)
  • 1 1/2 cups whipping (heavy) cream

  • Beat egg yolks in your stand mixer until fluffy and has a "lemon" yellow color. This take about 3 minutes. Gradually beat the sugar into the egg yolks. Heat 1 cup whipping cream in a saucepan over medium heat until hot. Gradually stir at least half of the hot whipping cream into egg yolk mixture; stir back into hot cream in saucepan. Cook over low heat about 5 minutes, stirring constantly, until mixture thickens (do not boil). Stir in chocolate chips until melted. Cover and refrigerate about 2 hours, stirring occasionally, just until chilled. Once you are ready to build you pie, whipped up the remaining whipping cream and gently fold the whipped cream into your chocolate mixture. 

  • Build it. 


  • Bake your crust and let it cool completely.


    Slice 3 bananas up and place around the bottom of the pie crust.


    Spread your pastry cream over the bananas.


    Spread your chocolate moose over your pastry cream.


    Top with whipped cream and chocolate shavings (if you like!)


    5.03.2011

    Birthdays and Baseball

    Two of my favorite things! If you don't know already my family and I are huge Angel's baseball fans. Thanks to my dad we have season tickets and do our best to take advantage of that as much as possible.


    So, naturally we go to the Angel's vs. Red Sox game for my brother Ryan's birthday.  


    HALT!


    Let me just put it out there now (and I apologize if I offend anyone reading this!) but I can NOT stand the Red Sox! BAH they just drive me crazy! Okay..phew I feel better that I got that off my chest :)


    Anyway, back to the story..


    Going to the game (my first of this season) was super fun. Hanging out with my little brother and sister and the BF. My sibs are pretty entertaining - I'll give them that.


    What made the day even better is that we got Howie Kendrick's autograph too! Granted...we waited in a 2 hour line in the mall. Its okay though, tots worth it :)

    Ryan and Howie (we got a blinker!)
     Jenna and Howie
     My turn!!

    So it was an Angel's filled day and I am SO okay with that. I even made my brother a birthday cake that was all about them Angel's.  GO HALOS :)


    Next Post: Stagecoach and how amazing it was!!

    12.01.2010

    Latte Lovin'

    I wish so badly that Starbuck's had a frequent buyer/caffeine addict card - that would make me feel much better about the amount of money I donate to them each month. However, during the holiday's I feel justified going there on an almost daily basis because of the red cups! I adore the Christmas red cups..like a lot. I even have the red cup Christmas ornament :)

    My favorites: Cafe Latte, Caramel Macchiato - iced, Peppermint Mocha.

    Let me introduce you to someone who loves espresso more than pretty much anyone I know.. Mike's Dad.
    Meet Mike's parents:
    He is also my future barista trainer and his birthday just passed and I promised him some form of a chocolate mocha cake. Although it was a belated birthday gift by a week or two I created a cake and an even better frosting that I think he was happy with. 


    I'm not gonna lie. I have been nervous about attempting an espresso flavored cake because it seemed like a daunting task but I am more than excited about how it turned out. MM MMM good!

    The secret ingredients??


    So we can check "espresso cake" off my checklist! Happy Birthday to you Mike and I hope you enjoyed your cake!  

    I will get you guys the recipe and soon as I remember what I put into the cake. I was too busy dancing around to "Baby, it's cold outside" to write down what I was doing.

    Happy December!
    where did the year go??


    10.19.2010

    Growing Older, Not Really Growing Up

    Pheww - what a week! In the last week, I have grown another year older, started a new job in a new town which requires me to be at work at...believe it or not..0515! That is code for 5:15 AM and no, I am not lying.


    Needless to say, its been a long one.


    Last weekend I celebrated my 23rd birthday (although I still feel like I'm five) with friends and family and it was soo much fun! It was obviously necessary that all 23 years be represented on the cake..

    The most exciting part of it was the amount of fabulous baking appliances I received as gifts. Christmas come early!  I am now a proud owner of a PINK Kitchen Aid Mixer!!! I definitely ran around telling everyone about that as soon as the wrapping paper came off.  Thanks Mom and Dad! :)
    My amazing boyfriend got me an awesome camera to use to take better pictures of things for this blog. Thank you Mike! <3

    AND.. I now have a great giant baking sheet, a cookie press and a frosting pen. I know...crazy right? I definitely got spoiled.
    Amazingg!! Thank you Debbie, Mike and Kris!

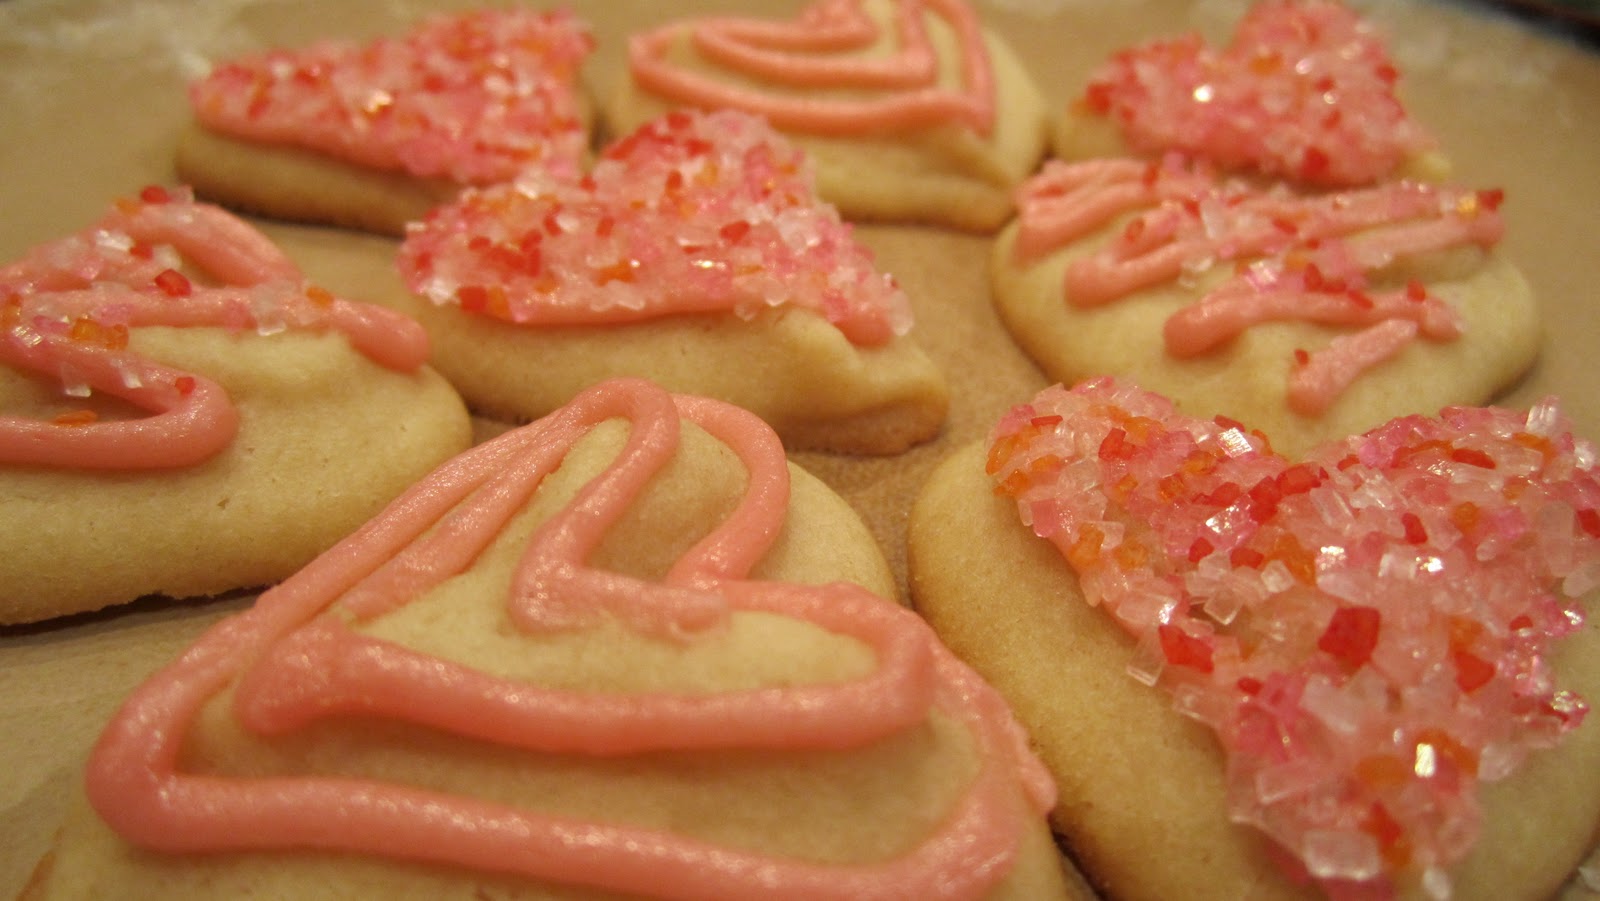
    So after a seven day stretch of being at work before the sun has even thought about rising I was really looking forward to spending some time in the kitchen. Turns out this cookie press is loads of fun! It definitely took some experimenting but I think I got it down by the end. I love these cute, bite-sized cookies that you can decorate to fit any and every occasion. 

    I like the color pink...did you know??


    RECIPE:

    2 1/2 cups unbleached AP flour
    1/2 teaspoon salt
    2 sticks unsalted butter, room temperature, cubed
    1 1/2 cups confectioners' sugar
    2 tablespoons vanilla extract
    1 teaspoon almond extract
    1 large egg

    Preheat oven to 350
    Mix flour and salt in small mixing bowl, set aside
    In stand mixer, combine together the butter and sugar until light and fluffy
    Add the vanilla and egg, mix to combine
    Add the dry ingredients and mix on low until combined
    Load your cookie press and press cookies onto ungreased baking sheet
    Bake for 8-10 minutes 
    Decorate as desired!

    Frosting:


    3/4 cup unsalted butter, cubed and room temperature
    2 cups confectioners’ sugar, sifted
    1 tablespoon vanilla extract
    1 tablespoon light corn syrup
    food coloring as desired

    In a large mixing bowl, beat the butter and sugar together until light and cream
    Add vanilla and corn syrup, mix until smooth

    10.07.2010

    October = Warm and Fuzzy

    Ask my boyfriend and he will say that October 1st marks the beginning of my month long birthday celebration. Which would be awesome but I think people might just get annoyed with me trying to celebrate my birthday on all of their birthdays..? Yeah, thought so. October is not only the best month because some wonderful people where born this month but it represents the real beginning of fall and the holiday season. October means boots and scarves, halloween (which means candy!), pumpkin spice lattes (which also means peppermint mochas and red cups are soon!), pumpkin bread, cool sunny days, blue skies, fallen leaves, James Taylor CD, relaxing spirits and most importantly, BAKING!


    A handful of birthday's have already passed so naturally, their present from me is some form of sugary baked goods. So far, my friends Lora and Shane got brownies and my brother's friend Melissa got herself a cake. Is your birthday coming up?? Let me know what you would like :)


    Chocolate Caramel Brownies with Walnuts


    Red Velvet Cake with Cream Cheese/Marscapone Frosting


    "Bittersweet October.  The mellow, messy, leaf-kicking, perfect pause between the opposing miseries of summer and winter."

    Happy Warm and Fuzzy October!! :)


    RECIPE: brownies

    2/3 cup semisweet chocolate chips
    1 stick unsalted butter, softened
    2 cups firmly packed light brown sugar
    3/4 cup caramel, room temperature
    3 large eggs, room temperature
    2 teaspoons vanilla extract
    1 1/4 cups unbleached all purpose flour
    2 teaspoons baking powder
    1/2 teaspoon salt
    1/2 cup walnut pieces

    Preheat oven to 350 degrees and place rack in center of oven. Line a baking pan with parchment paper and lightly coat with cooking spray or melted butter.
    Use a warmer or a double boiler to melt the chocolate, stirring occasionally. (Make sure not to seize the chocolate)
    In a stand mixer, cream together the butter and brown sugar on medium-high speed for five minutes until light in color and forming clumps. 
    Scrape down sides of the bowl and add the caramel and incorporate. 
    Crack eggs into a separate bowl and combine together with a fork. Add the egg in four batches allowing to completely incorporate before adding more. Beat in vanilla extract and scrape bowl.
    In a medium bowl, combine flour, baking powder, and salt. Add to the caramel mixture all at once, then blend on the lowest speed just until you no longer see streaks of flour and the batter is smooth. Scrape down and make sure its completely incorporated. 
    Spread half of the batter into the bottom of your baking pan. 
    With the remaining half of the batter, incorporate the melted chocolate. Mix together and then lay the chocolate batter on top of the caramel batter in the pan. 
    Use a  knife to swirl and spread the batter so it lays evenly in the pan (it is okay for them to blend into each other). 
    Sprinkle the walnut pieces across the top and lightly press into the batter.
    Bake for 30-35 minutes or until a toothpick comes out clean.
    For an extra kick, drizzle caramel over the top of the warm brownies and serve with ice cream!

    RECIPE: cake


    Red Velvet Cake:
    2 1/2 cups (250 grams) sifted cake flour
    1/2 teaspoon salt
    2 tablespoons (15 grams) regular or Dutch-processed cocoa powder
    1/2 cup (113 grams) unsalted butter, at room temperature
    1 1/2 cups (300 grams) granulated white sugar
    2 large eggs
    1 teaspoon pure vanilla extract
    1 cup (240 ml) buttermilk
    2 tablespoons liquid red food coloring
    1 teaspoon white distilled vinegar
    1 teaspoon baking soda
    Cream Cheese Frosting:
    1 - 8 ounce (227 grams) cream cheese, room temperature
    1 - 8 ounce (227 grams) tub of Mascarpone cheese, room temperature
    1 teaspoon pure vanilla extract
    1 cup (115 grams) confectioners' (icing or powdered) sugar, sifted
    1 1/2 (360 ml) cups heavy whipping cream (contains 36-40% butterfat)
    Preheat oven to 350 degrees F (175 degrees C) and place rack in center of oven. Butter two - 9 inch (23 cm) round cake pans and line the bottoms of the pans with parchment paper. Set aside.
    Red Velvet Cake: In a mixing bowl sift together the flour, salt, and cocoa powder. Set aside.
    In bowl of your electric mixer, or with a hand mixer, beat the butter until soft (about 1-2 minutes). Add the sugar and beat until light and fluffy (about 2-3 minutes).


    Add the eggs, one at a time, beating well after each addition. Scrape down the sides of the bowl. Add the vanilla extract and beat until combined.
    In a measuring cup whisk the buttermilk with the red food coloring. With the mixer on low speed, alternately add the flour mixture and buttermilk to the butter mixture, in three additions, beginning and ending with the flour.
    In a small cup combine the vinegar and baking soda. Allow the mixture to fizz and then quickly fold into the cake batter. 
    Working quickly, divide the batter evenly between the two prepared pans and smooth the tops with an offset spatula or the back of a spoon. Bake in the preheated oven for approximately 25 - 30 minutes, or until a toothpick inserted in the center of the cakes comes out clean.
    Cool the cakes in their pans on a wire rack for 10 minutes. Place a wire rack on top of the cake pan and invert, lifting off the pan. Once the cakes have completely cooled, wrap in plastic and place the cake layers in the refrigerator for at least an hour (or overnight). (This is done to make filling and frosting 
    the cakes easier.)
    Cream Cheese Frosting: In the bowl of your electric mixer, or with a hand mixer, beat the cream cheese and mascarpone cheese until smooth. Add the vanilla and confectioners sugar and beat until smooth. Using the whisk attachment, gradually add the heavy cream and whip until the frosting is thick enough to pipe. Add more sugar or cream as needed to get the right consistency. If the frosting is not thick enough to spread, cover and place in the refrigerator for an hour, or until it is firm.